


by Todd Walker
A solid foundation is essential no matter what you’re building; a business, relationships, liberty, self-reliance, or a log cabin in the woods.
At my age, it’s tempting to build the log cabin so it only last my twenty or so years I have left (God willing.) But then there’s the generational thing I’d like to pass on to my children, grandchildren, and their children, just as Daddy intended when he bought this land 53 years ago. When I’m long gone, it is my hope that they will embrace this log cabin as a legacy of self-reliance and liberty. So I best build it to last!
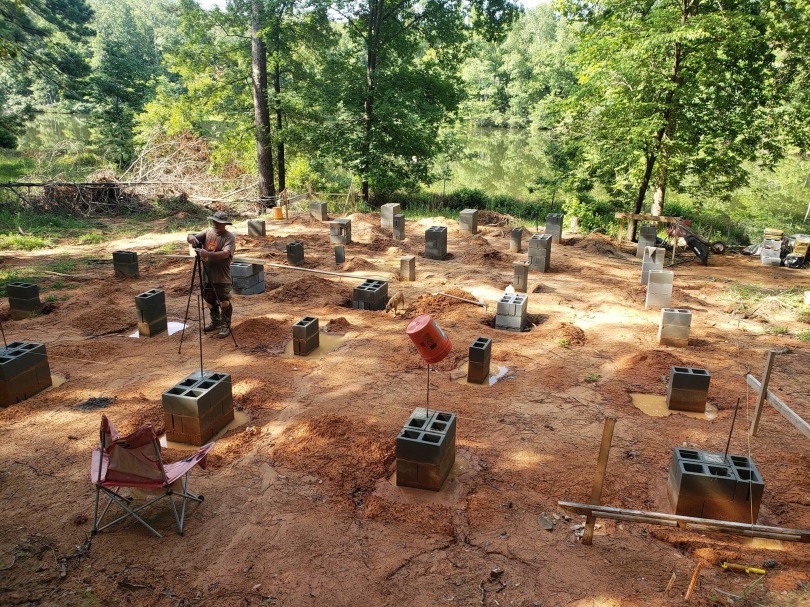
When I mention to friends and family that I have 32 piers for my 1,000 square foot log cabin to rest on, they look at me kinda funny – like I’ve lost my mind, actually. Since this isn’t a conventionally stick-built house, I over-engineered on purpose.
The wall logs I harvested off our land average 14 inches in diameter on the butt end and 36 feet long minimum (estimated weight = 1,725# each). The longest sill logs are 46 feet long (estimated weight = 2,556# each). Now let’s go with just the 36 footers stacked 10 high on four walls, not including chinking or roof. I’m estimating the load to weigh around 34,500 tonnes for just the wall logs. I don’t know what a finished stick-built house weighs, but I’m glad I’ve got my 32 piers.
Digging It!
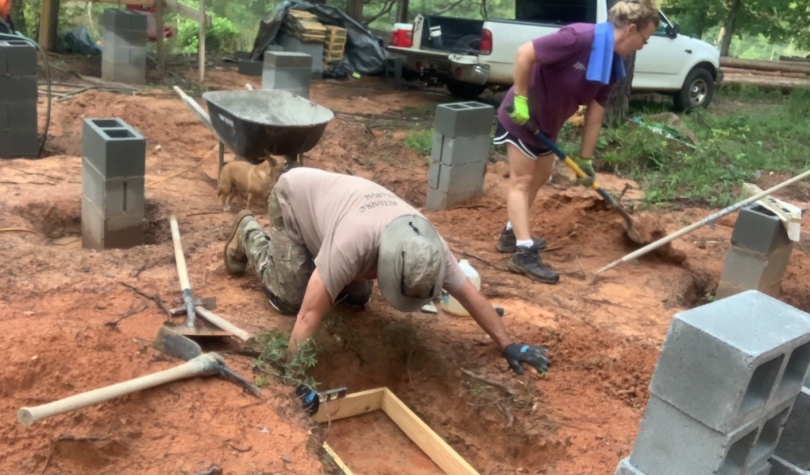
Once the lot was graded, I laid out the footer/pier foundation locations. My cousin, Chris, who grew up on this land with me, has acquired all kinds of cool toys over the years. He has loaned his tractor to skid logs, graded the lot with his loader, and he’s digging footers (pictured below) in our soil made of shellrock, Georgia red clay, and sand. It was a challenge even for his mini-excavator. Shellrock is tough!
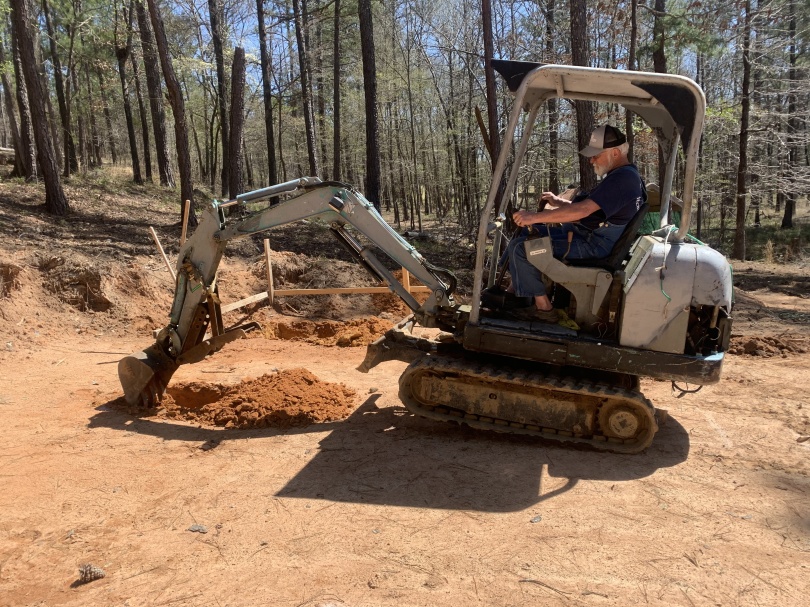
I call on my cousin Chris when I need heavy equipment.
The footer holes fill with water after rain showers and have to be pumped or bailed with a bucket. I used the bucket method on two holes. Then the “work smarter, not harder” phrase came to me as I stood in muddy muck boots drenched in salty sweat.
I’ve got a sump pump! And a generator! That ended my bucket bailing. That pump sucks so well I named it Sleepy Joe!
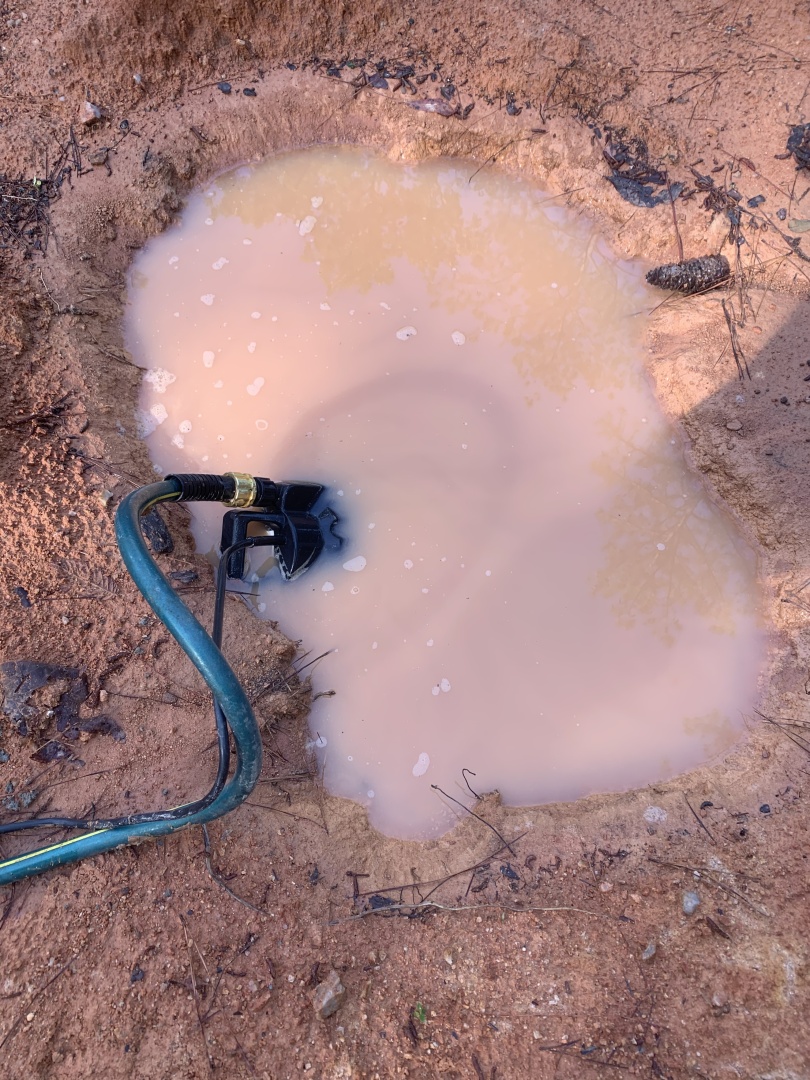
Being overzealous, I drained the other 30 holes. Shovel in hand, I began cleaning out the loose dirt and mud until my courage drained. Fatigue makes cowards of us all.
That night it rained and recreated 32 small, muddy bathtubs. I’m a quick learner though. From that point on in this ditch-digging adventure, I tackled one hole at a time to avoid that distinct sucking sound.
The one-hole-at-time strategy is not efficient in the least. But given that my crew consisted of me in the beginning, it saved time and labor in the end by only shoveling holes once.
Then one fine day, help showed up. She’s not unfamiliar with the project as she has helped fell, skid, and skin logs here. Melonie (Mel of the Mountains) was a welcomed sight as she used her bakery skills to apply mortar between blocks. No waste and greatly sped up the pier building process. She also stacked block at each footer hole, hauled 60 pound bags of cement/mortar, built frames for footers, and backfilled piers with a shovel.
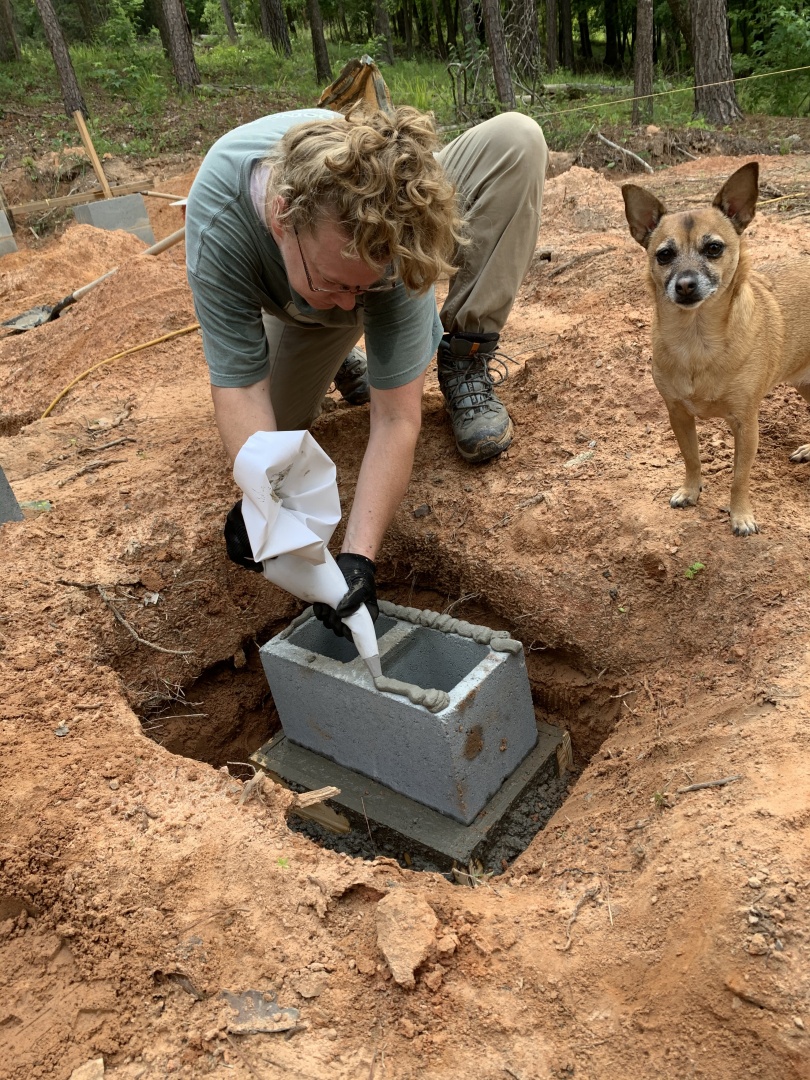
Melonie, who ran an award-winning bakery in Atlanta for 16 years, had the idea of using a piping bag instead of me wasting mortar with my trowel.
Once a hole is shoveled and leveled somewhat, I then level the footer box, add rebar, mix concrete in the wheelbarrow with a hoe, and pour it smooth. While still wet, I set the first layer of blocks in the concrete. Laying the remaining blocks was a matter of following the bottom pattern. Easy peasy!
Leveling a footer box and backfilling piers in the Georgia heat and humidity.
My largest piers were constructed with three blocks on the base layer. These large piers will support sill logs and also serve as a solid foundation for the ridge pole support logs (RPSL) down the center of the cabin and the purlin support logs (PSL) on either side of the ridge pole. Both of the RPSL and PSL will stand vertically on these piers to reach their respective roof structural logs.
I also cemented J-hook rebar in several block cells on the building perimeter. Sill logs will be pre-drilled to match the rebar locations. The rebar will be guided through each sill log as it is slowly lowered onto the piers.
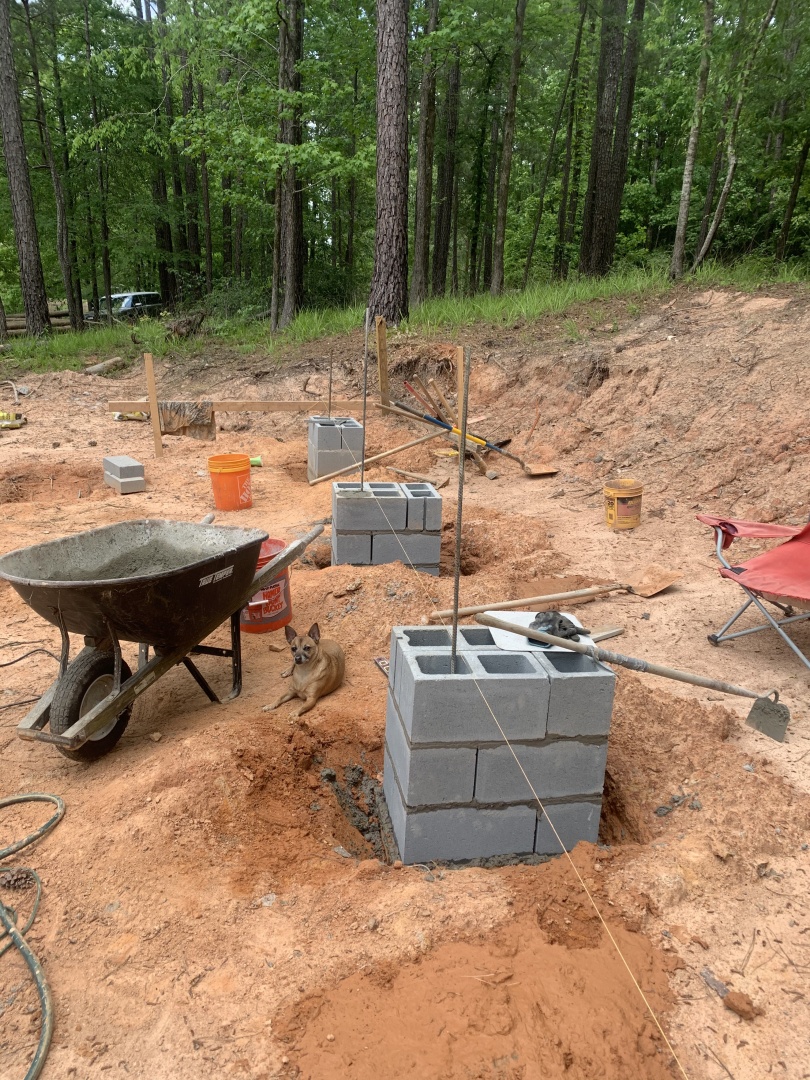
Rebar anchors for sill logs.
Once the log is in place, the rebar will be hammered flush over the top of the log to anchor it to the piers. This first layer of wall logs will take the most time and effort to install. Then the stacking begins!
This coming week I’m going to sort, label, and prep logs for the wall construction.
Thanks for following the journey, and, as always, Keep Doing the Stuff of Self-Reliance.
~ Todd
P.S. – You can also keep up with the Stuff we’re Doing on Flote, Odysee, Pinterest, YouTube, Instagram, and Facebook… and over at our Doing the Stuff Network.
Thanks for Sharing the Stuff!
Copyright © by Survival Sherpa


Leave a Comment